Sunday 5 May 2013

Here's a video of the Dji Phantom transplanted onto a F450 Frame.

Stock Phantom board, stock ESC'S, Added RC-timer 1000kv motors and RC-timer carbon fiber 10-5 props. 2200mah battery.  Flight time 11mins.


Here are some pics.


Friday 5 April 2013


Part two of the Phantom to F450 frame.

Here is the Frame arrived this morning.....


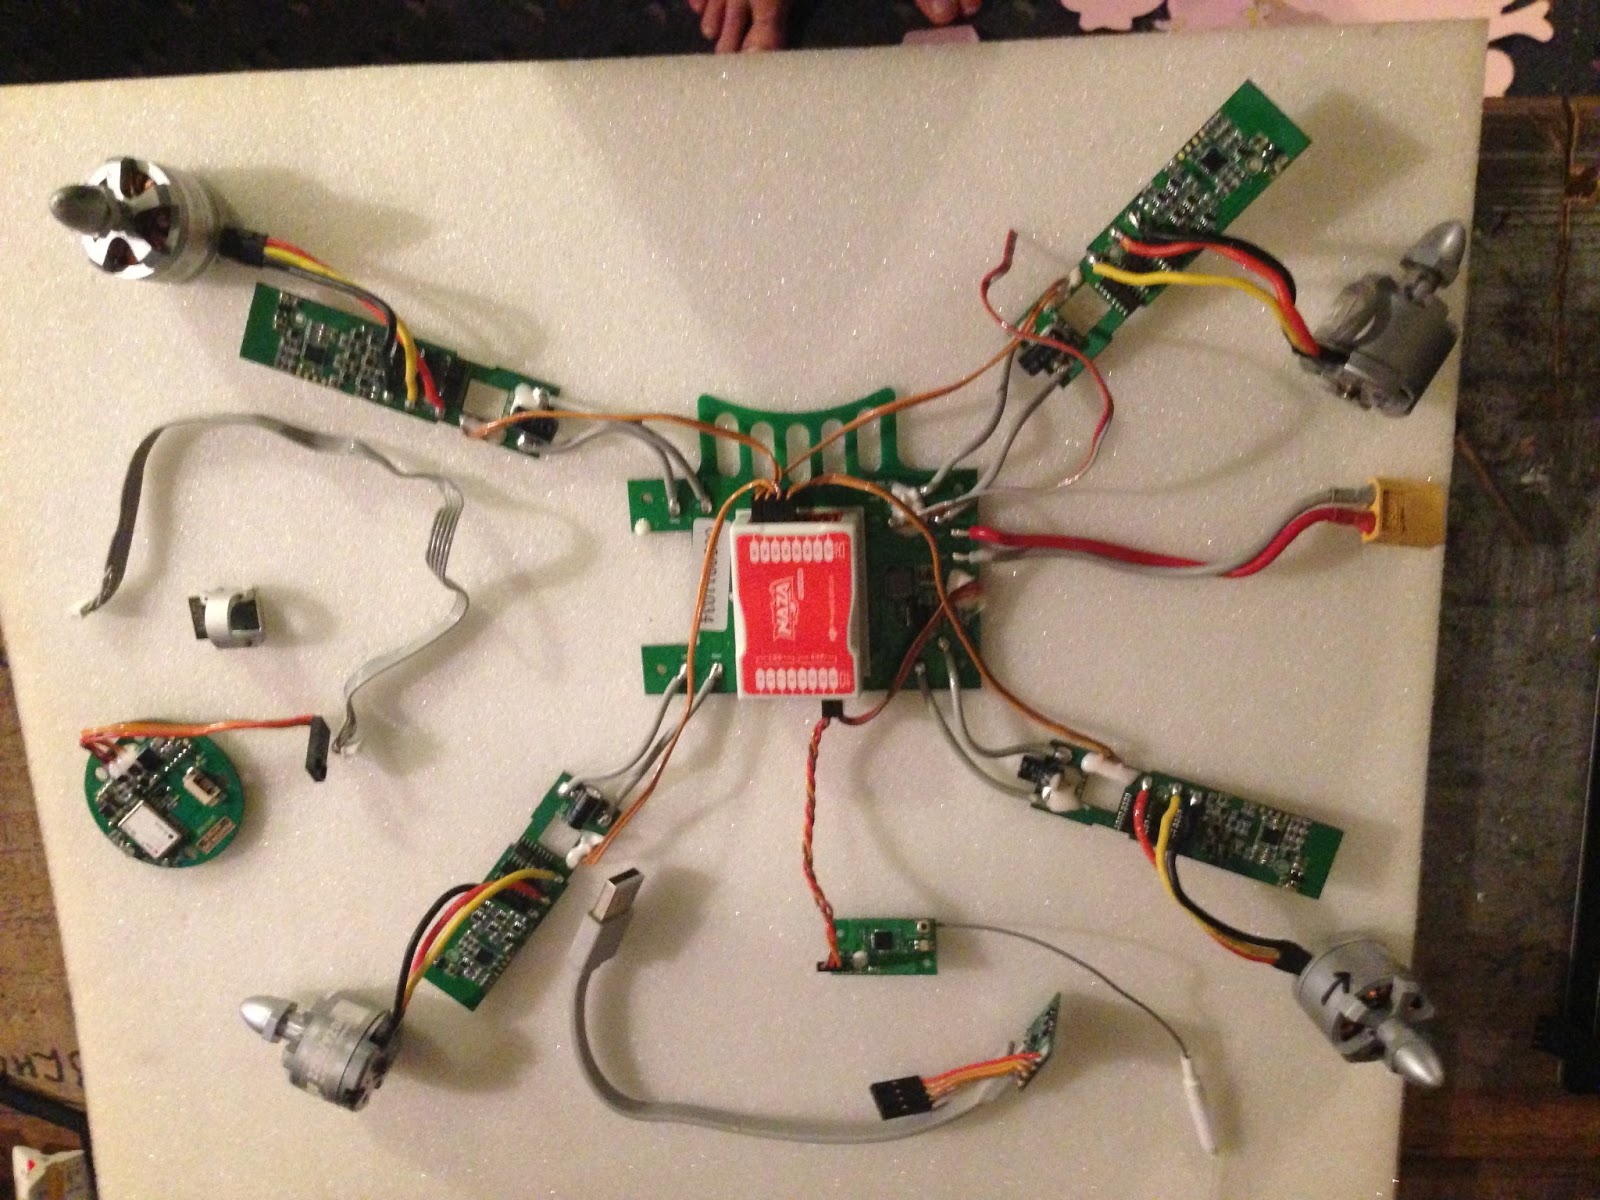
Next step transferring the internals over to the frame, I used double sided adhesive foam pads, seem to work pretty well and add a little isolation to the naza.


Then the ESC's leads where threaded trough the legs, and then the legs attached.


The next job was attaching the LED and usb board, again double sided foam pads where used, and positioned so that the led can be seen from below ( I intend to cover the led in a small plastic bubble to magnify the intensity) I can still plug the usb lead in here but will extend it with a male to female lead down to one of the legs.


The receiver board was next, this time I mounted this on two bolts attached to the frame with two small pieces of silicon tube as an isolator then a small blob of silicon sealant to secure it.


Next was the gps module, I did start by making a housing for this, but then thought that I should keep the gps module in pretty much the same position as when it was on the phantom. Heres a picture of the first housing.


So after measuring the position of the gps in the phantom it turns out that mounting on top of the top plate was the same position, attached again with tiny little foam pads.


Nearly done for tonight, I cut the motor wires and mounted them, ready for the ESC attachment and motor wire extensions. This is where it is up to at the moment. Just before I cut the wires I did a start up check and everything checked out even the GPS locked onto a couple of sat's, that's even in the garage, the compass was taped onto the legs. ( I intend to replicate the position of the compass on the phantom and make a small mounting pad to secure the compass to the landing legs.)

Any way here's a couple of pictures of it as it stands. wires will be extended and the esc's mounted under the arms.


Friday 29 March 2013

Here is the start of the Phantom to F450 conversion.
Seems around the same size, just need to extend the motor leads.
I started by removing the landing gear: 4 no screws, and the compass lead.
Next came the12 No hex head screws, followed by the 4No small cross head screws at the ends of the motor arms.
I unplugged the GPS lead from the Naza and removed the top cover. Carefully remove the sticky cover and remove the four cross head screws holding the GPS to the cover.


 The next step is to remove the Led lead and USB lead from the Naza. (taking photos as you go along really helps for when you need to put it all back in.

Here it is removed.
Next remove the four crews holding the Led arm covers on, then remove the 4No hex bolts from each of the motors, then remove the 8 No cross head screws holding the ESC'S on to the frame( be careful and remove the transmitter board also)

You should then be able to then remove the whole board and motors from the case. You will be left with this...

Next step drilling out the RC-Timer Carbon props and balancing them (only one prop needed balancing straight out of the pack) by the way RC-Timer are doing a deal at the moment NZ$30.00 for 8 No 10.45 carbon props.

 
Picture of landing gear to be used, along with two axis gimbal attached


Internals all ready to go in......


Part two to follow.......
 

Wednesday 20 March 2013

My next sort of Mod is to transplant the internals from a spare Phantom onto my 450 flame wheel, as its pretty good for Ariel filming with the built in two axis gimbal, but not that steady with its KKController. I was going to buy the flame wheel with naza and gps, but the cost was way more than a whole Phantom package, and if you buy the Phantom bundle you don't need to buy the tx/rx and I will end up with a spare body, motors and esc's.


The landing legs and two axis gimbal where bought from www.unmannedtechshop.co.uk  They shipped it from the U.K to New Zealand and it took 7 Days. Ultra fast delivery (thanks)
Took about twenty minutes to assemble and the quality is brilliant.

The Carbon camera mount on the Phantom can also accept the landing gear and gimbal setup from the Flame wheel.

Tuesday 19 March 2013

Making the DJI Phantom more user friendly

After getting my hands on  phantom and attaching a Go-pro, my first videos where far from perfect.
The dreaded "jello" effect was there, so off with the camera mount it was. After experimenting with
various bits of foam and rubber I decided on a carbon fiber plate with rubber grommets, there are a few on the web but I thought I would make one my self incorporating a few ideas.

.
 
 
The second mod was to Get hold of a set of carbon fiber props, these where sourced from +RC-Timer.
Just needed to drill a 8mm hole, fitted perfectly and needed no balancing.


(Just thought I would mention, the phantom came with a few faults, 1: Battery charger faulty, 2:one motor bearing very noisy.
 I could have returned it to the shop, but I am in NZ and I bought it from the UK, and it would of taken ages for the turnaround, added to that the shop was not that helpful on the phone, so I didn't want to be mucked about with the return.  I bought a turnigy computer charger to replace the standard one, much more accurate. And I ordered a couple of spare motors from www.buzzflyer.co.uk  DJI original replacement's (NZ$32.00 the pair) 8 day delivery time, Brilliant. They also sell original DJI complete body kits, ESC,s, Transmitters, landing gear and phantom compasses.


DJI Phantom, my fly through of my house, with carbon mount.